Click on any image to enlarge.
1. The easiest way to find the SmartJob to revise is through Global Search. Enter the SmartJob name and hit enter.
A summary row will then show that you will then click on to bring you to the details dialog.

2. The SmartJob Details dialog will open on the General tab.
Click on the “Make Router Changes” button
3. A confirmation dialog will open.
If you would like to proceed, click “Confirm”.

4. This will open a SmartJobs Builder screen where you can perform your edits.
Click on the “Add Item” button

5. This will open the Update SmartJob Wizard
You will then select either Tasks Only, or SmartJob with Tasks from the drop-down list.
And then whether you will select task/s from an existing template or from Scratch. If you select from template, you will then select from which template category and which specific template within that category.
And then click on “Next”.

6. If you select “Scratch” no other selections will be required, and you will next have to enter how many tasks you wish to insert.
You would then click on “Next”.

From this point forward we will be following the path if “Scratch” was selected as this required all inputs.
7. Next you would rename the tasks from the numeric default. It would be a good idea to maintain consistency with the existing tasks within the SmartJob.
And then click on “Next”.

8. Next you would reorder the tasks to ensure the new task is inserted in the appropriate sequence by dragging and dropping.
And then “Save”

9. This will take you to back the SmartJob Details screen where you will enter all the relevant information to complete the SmartJob construction.
The information icons show where additional information is required.
You can view all the errors (incomplete information) by clicking on the “View Errors” button.

10. Result of clicking on the “View Errors” button.

11. The next step would be to start at the Time Segment tab for the newly inserted task.
And click on the New Time Segment button

12. This will open the Create Time Segment dialog
You will need to enter a name for the time segment which could be typically
“setup” to account for preparation work like a changeover
“runtime” which is a per unit time for the quantity to be worked on
cleanup which would be work after a task has been completed
Select a Measurement of either Unit, or Time
Enter the duration for the time based time segment, or the per unit time
And click on “Done” after you have entered the above information

13. If you have created multiple time segments for this task you will then have to select which time segment is the runtime for scheduling purposes. And then Save.

14. Each time segment will now need to have Resource Requirements added.
By clicking on the New Requirement button.
If all the time segments will use the same requirements you can check the box, otherwise you can add requirements for each.

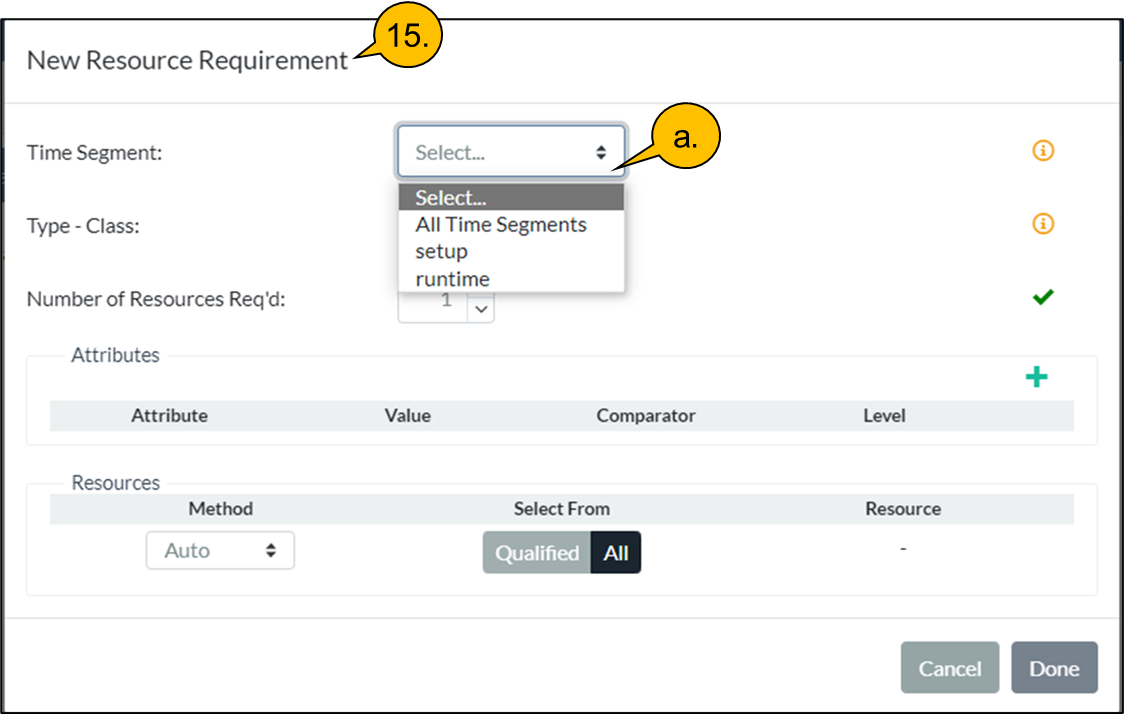
15. The New Resource Requirement dialog will open.
And you will first need to select a specific time segment, or you can choose All, which applies your subsequent entries to all of the created time segments for this task.
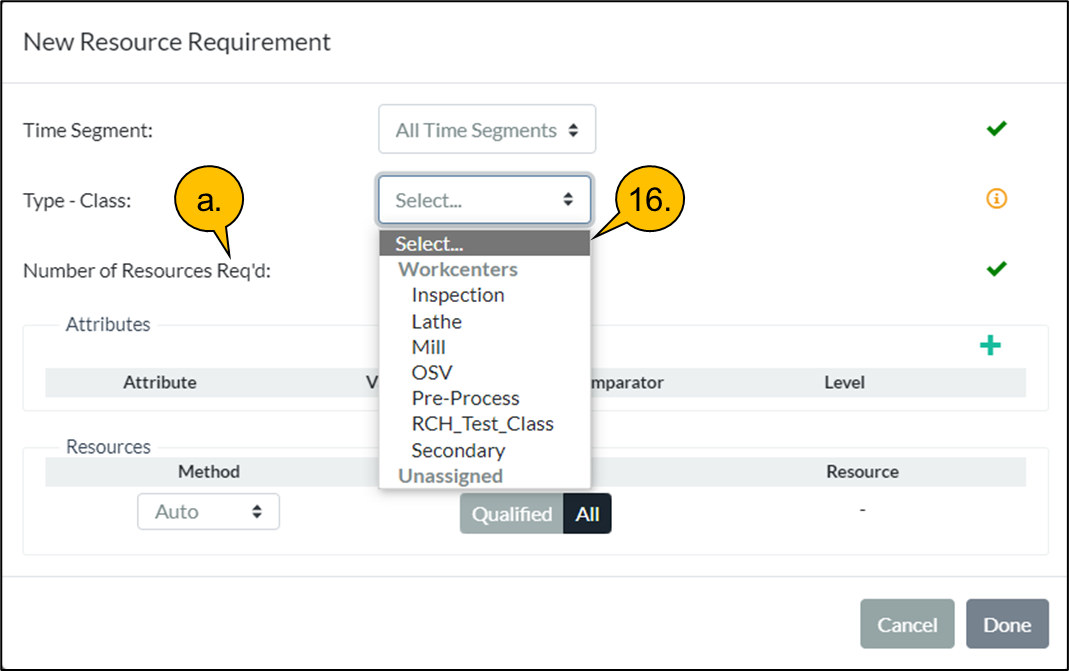
16. You will then need to select the Resource Class in which the attributes to be used for matching have been saved.
And the number of those resources needed for this task, or time segment.
17. You will then need to define which attribute, value and level assigned to the Resource Class will be used for scheduling.

18. And finally, whether you want the matching to occur using Auto, Preferred, or Pinned.
And if Preferred, or Pinned which specific resource the engine should use when scheduling.
When finished click “Done”. And Save your additions.

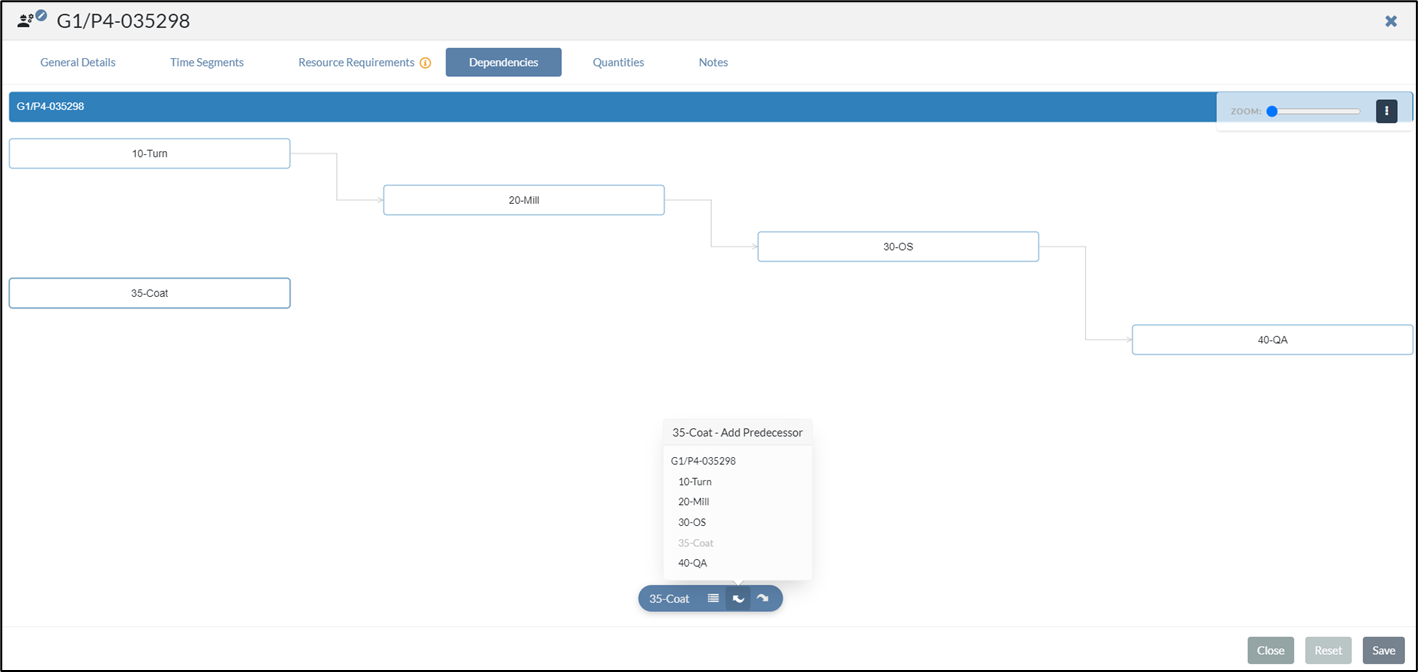
19. Next dependencies need to be established between the created tasks.
Select the newly inserted task to add a dependency
Then click on the add predecessor and successor icons
And select the predecessor and successor tasks and remove any other dependencies that are no longer valid.
20. And the created dependency now displays.

21. At this point you can go back to the General Details tab
And are ready to “Release for Scheduling”.
