Click on any image to enlarge.
1. The easiest way to find the SmartJob to revise is through Global Search. Enter the SmartJob name and hit enter.
A summary row will then show that you will then click on to bring you to the details dialog.
![](https://s3.amazonaws.com/cdn.freshdesk.com/data/helpdesk/attachments/production/9171626900/original/9Rdd6jUNd19OJJZ5ADrsaW0HQTyR8T4Bmw.png?1666789647)
2. The SmartJob Details dialog will open on the General tab.
Click on the “Make Router Changes” button![](https://s3.amazonaws.com/cdn.freshdesk.com/data/helpdesk/attachments/production/9171626901/original/1P5gti3X-McoX_kcMzsgQgeRrnQcFeBaLw.png?1666789647)
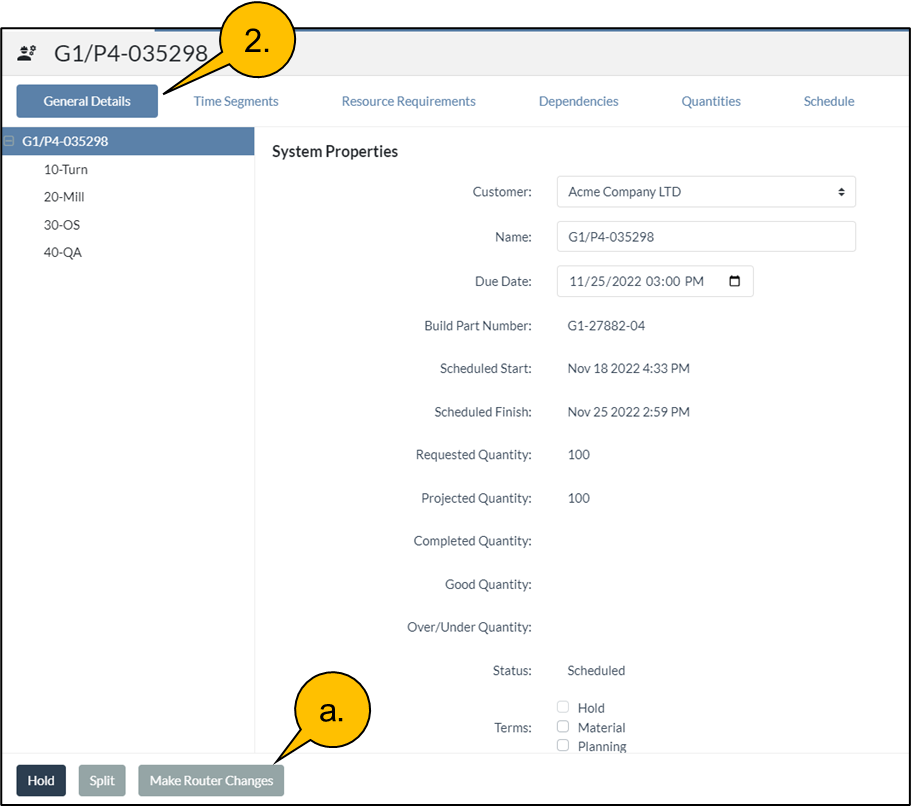
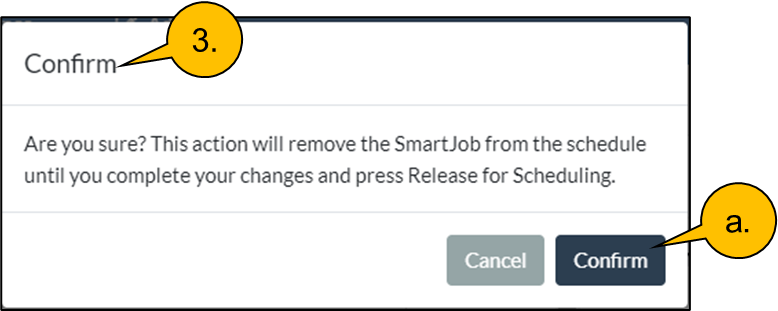
3. A confirmation dialog will open.
If you would like to proceed, click “Confirm”.
![](https://s3.amazonaws.com/cdn.freshdesk.com/data/helpdesk/attachments/production/9171626903/original/fTKjUbB6hiHz2v8CoTTNqiyE239KSIhFxA.png?1666789647)
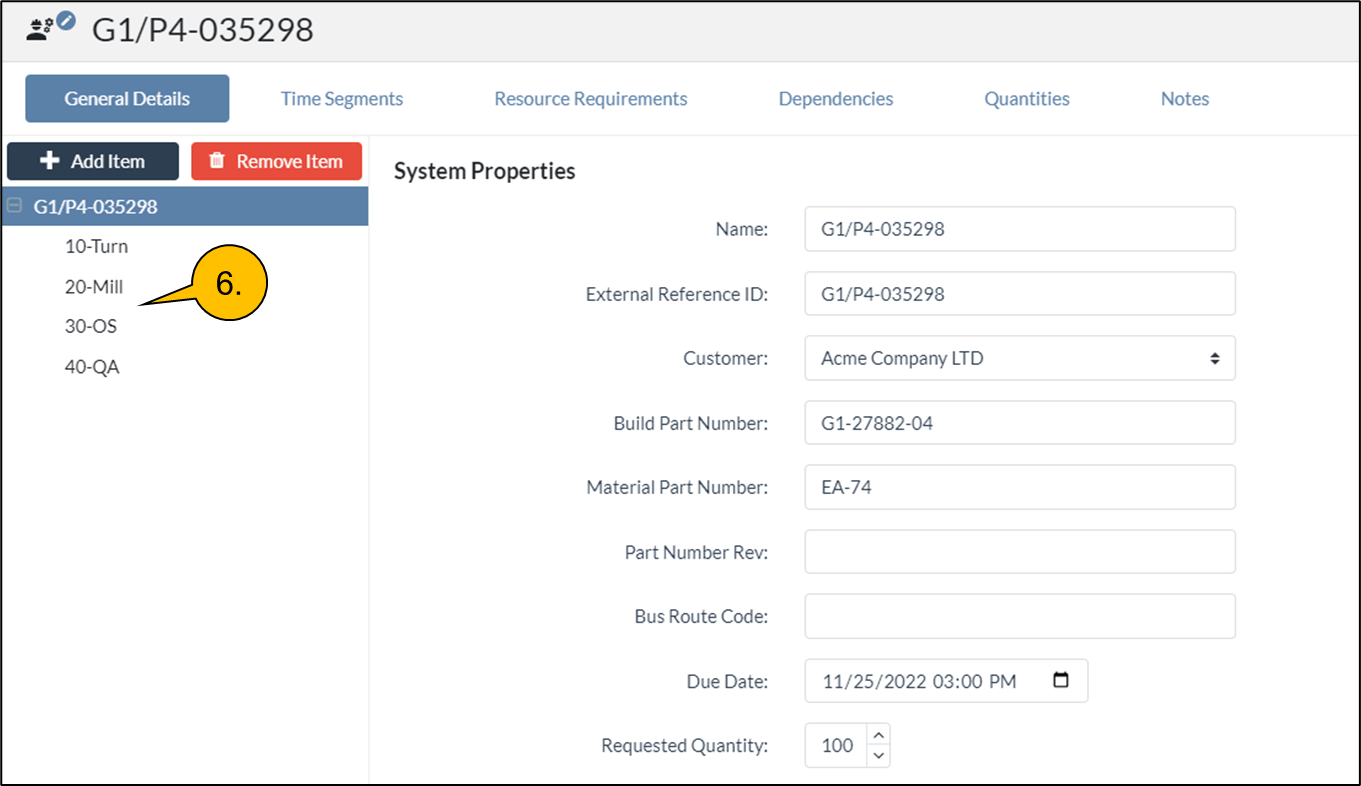
4. This will open a SmartJobs Builder screen where you can perform your edits.
Click on the task you would like to delete from the SmartJob.
Click on the “Remove Item” button
![](https://s3.amazonaws.com/cdn.freshdesk.com/data/helpdesk/attachments/production/9171626904/original/wERv4e2tIJXHcLN_HWYq1D8TTzilav_bVw.png?1666789648)
5. A confirmation dialog will appear and if you want to continue click on “Confirm”.
![](https://s3.amazonaws.com/cdn.freshdesk.com/data/helpdesk/attachments/production/9171626902/original/ElmLOzuD2dFFHxvdkOzEOO4xMq06OUdPQw.png?1666789647)
6. The General Details tab will then be updated that shows that task was deleted.
![](https://s3.amazonaws.com/cdn.freshdesk.com/data/helpdesk/attachments/production/9171626905/original/8tU93K7BJz-eGQzUebLOPPk7hRCGV-2ekA.png?1666789648)
7. You then would click on the Dependencies tab
Select the task/s that no longer has dependencies
Select the add predecessor/successor icon/s
Select the appropriate tasks
And Click on
![](https://s3.amazonaws.com/cdn.freshdesk.com/data/helpdesk/attachments/production/9171626908/original/bZx4osR9NQSwy4CKHTYUbN4xQDmnR_mTKQ.png?1666789648)
8. Once saved the dependencies should now reflect correctly.
![](https://s3.amazonaws.com/cdn.freshdesk.com/data/helpdesk/attachments/production/9171626907/original/TISoFrFcSmtHsuy_OxzRzVB6FozPCsSvEw.png?1666789648)
9. Click on the General Details tab
And then click on “Release for Scheduling, which will provide confirmation of a successful release.
![](https://s3.amazonaws.com/cdn.freshdesk.com/data/helpdesk/attachments/production/9171626909/original/DEVEpQPO6GHaLYzxi5XeZRaQwRKN0EopMA.png?1666789648)